How To Get The Best Out Of Your DTF & UV Prints
To get the best out of your DTF and UV prints, you need to be mindful of the following points...
Resolution
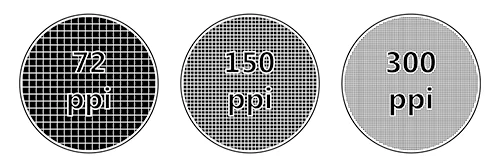
The resolution of your images is one of the most important aspects of your artwork in order to get the best results with your prints. All forms of digital printing are made up of lots of tiny little dots. So, the more dots you have for a given area, the sharper the image will look. The terms often used for describing resolution are PPI (Pixels Per Inch) and DPI (Dots Per Inch). Even though our printers operate at higher resolutions, our minimum requirement is that your artwork is at least 300ppi (or 300dpi). That way, we can ensure that your prints are sharp and detailed.
Now, an increasing amount of people are using easy online tools such as Canva to create their artwork. However, a common issue they are facing is that their exported artwork does not, by default, have a high enough resolution. This is because these tools automatically assume that you are designing for screen usage rather than for print, and the regular resolution for screens is either 72dpi or 96dpi. However, it is still possible to export your artwork at higher resolutions, as long as any included images were of high enough resolution to start with. Here is a quick video tutorial to help explain this.
Colours
There are 2 schools of thought when it comes to choosing colours:
- Those that want accurate colours
- Those that want vibrant colours
Additionally, DTF printing is used on a vast variety of fabric types and colours. So, how can one achieve both accurate and vibrant colours on their chosen fabrics? Firstly, you must understand some of the basics about colour, and then look at how our processes can help you achieve your desired results.
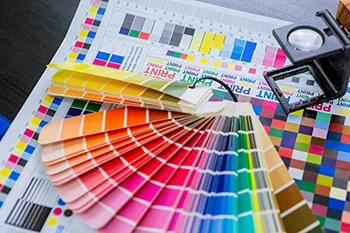
Almost all digital print processes use the CMYK print process. However, we all normally view colours on RGB screens, whether on computer screens or mobile devices. Some colours that look great on screen are not reproducible in print, and vice versa. To compound this, commonly used design software (like Photoshop) are not always very good at converting RGB colours to CMYK, and there are generally big colour shifts when trying to do this. However, this does not mean that you cannot achieve accurate colours with RGB artwork!
The easiest way for you to achieve great results is to upload images and gangsheets in PNG file format. This means that they will be in RGB and allow for transparency. Our RIP software is very good at converting those RGB values into CMYK for printing without a big colour shift. However, if you are concerned about how your colours will turn out, we recommend you obtain our Premium Sample Pack which contains printed RGB colour charts. You can then press these onto your chosen garment and see what colours you can expect to achieve with your own prints.
Backgrounds/Transparency
Both DTF and UV printing will print all the contents of your image, as it is supplied. So, if your images have a background then this background will be printed too. If you only want to print certain parts of your image, then the rest of your image must be transparent. This is why we recommend that you upload your images in PNG format with the transparency already set in them.
Blends To Transparency
One of challenges posed by DTF is when you want to blend any artwork into the background. This is because DTF needs powder glue to be behind any printed areas, and this means it can't print partial transparency - as would normally be required when blending into nothing (ie the colour of the garment).
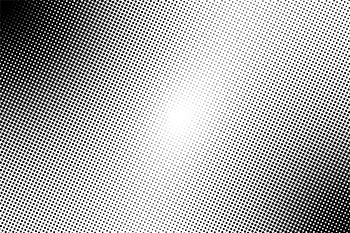
However, a clever way to get around this is by using what's called Half-Toning (see section below). By using Half-Toning to create blends, one can achieve very good blends from any colour (or mix of colours) into complete transparency, which is how you can blend your artwork into the colour of your garment.
Half-Toning
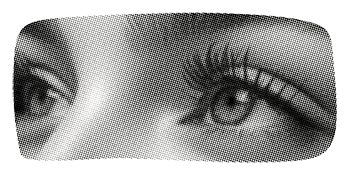
Half-toning is a technique used in print and digital media to create the illusion of continuous tone images. It involves breaking down an image into a series of dots of varying sizes and spacing. The human eye perceives these dots from a distance as different shades of gray or color, simulating a full range of tones.
This method is commonly used in printing processes, such as offset printing, where continuous tones cannot be reproduced. By adjusting the dot size and spacing, printers can create detailed images while using fewer inks. Half-toning is also utilized in photography and graphic design to enhance images and create visual effects. It is also a common technique in silk screen printing.
There are 2 key benefits to using Half-Toning for DTF:
- Achieving Blends To Transparency
- Making your prints soft to the touch
Halftoning is a very powerful technique, and one worth mastering. To get you started, here is a video tutorial on how to halftone your own images. It's not an easy process, and we recommend that you test your artwork properly first by ordering a small quantity of prints first for testing before making large orders.
Heat Pressing
The 2 most important factors for consistently achieving the best results from pressing are:
- Temperature
- Pressure
This is why we recommend using a good quality commercial heat press. They provide a more consistent temperature and pressure across the whole press area. Commercial presses are also generally very reliable and last a very long time, so they are a worthwhile investment and an essential piece of equipment for garment decoration.
Additionally, we recommend the following steps for the best results:
- Pre-heat your heat press to 145 degrees C (If in doubt, check the temperature with an infrared heat gun)
- Position your clothing on the heat press
- Pre-press for 3 seconds, to eliminate any residual moisture from the fabric and to ensure a flat pressing surface
- Position your transfer on the clothing
- Press the transfer for 12 seconds
- Wait a couple of seconds then hot peel your transfer (NOTE: for transfers with very fine lines, or when pressing onto hoodies - which retain more moisture - you may get a better result if you let the transfer cool down slightly before peeling)
- Re-press your transfer for 3 seconds to set the transfer fully into the fabric


